Arduino ProjeleriTeknoloji
Arduino ile araba için start-stop butonu yapımı
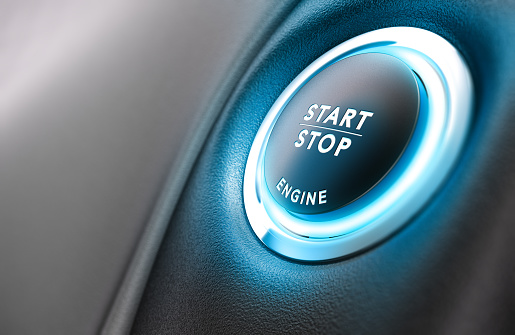
- arduino ile araç için start-stop butonu yapımı
Dünya üzerinde en çok kullanılan prototipleme kartı olan ARDUINO kartları ile yapılamayacak olan elektronik proje yoktur desek yalan olmazdı. Bu ilk projede yeni nesil araçlarda görmeye alıştığımız start-stop butonu uygulamasını paylaşıyoruz.
Öncelikle bilmeyenler için start-stop butonu arabanızı çalıştırmak için kullanılan kontak anahtarının yerine geçmektedir. Biz bu yazıda aynı kontak anahtarı gibi davranacak olan basit bir butondan bahsediyor olacağız fakat gerek araç güvenliği gerekse sürüş emniyeti için alınması gereken önlemleri almadan bu uygulamayı aracınızda denememenizi önemle hatırlatırız.
Bu projede ihtiyaç duyacağımız bileşenlere gelirsek;
Arduino Uno
4lü 12V Röle Modulü
Buton
Çeşitli Boylarda Kablo
Araba ve Elektrik Bilgisi 😀
Arduino Kodu
//Engine Start/Stop System - Steuerung - Starten Modul
//Designed and programmed by Daniel Dias de Moraes
//Tested on FIAT Uno Mille 1.0 - Carburated Engine (Gasoline)
// VERSION 4.3a - 24/04/2022
//================== Include Library
#include "pitches.h"
#include <SPI.h>
#include <Adafruit_GFX.h>
#include <Adafruit_PCD8544.h>
//================== SET-UP PINS
const int StartBTN = 13;
const int IgnitionRLY = 12;
const int StarterRLY = 11;
const int StatusLED = 10;
Adafruit_PCD8544 display = Adafruit_PCD8544 (3, 4, 5, 6, 7);
//================== SET-UP VARIABLE
int EngineState = 0; //Control the state of engine, Stand-by 0, Starting-up 1, Running 2, Shutting-down 3;
int StartStatus = 0; //Start Button Status, alternate between engine states;
int StartValue = 0; //Start Button Value;
int StartValue2 = 0; //Start Button Value 2;
int StartRetry = 0; //Retry count for engine unsucessful Start-up;
int Timeout = 0; //Timeout for multiple events;
int Flag = 0; //Flag to mark events that have to occur only one time
//-----------------= Variables for rotation sense
volatile byte rpmcount;
unsigned int rpm;
unsigned long timeold;
void rpm_fun()
{rpmcount++;}
//-----------------=
//======================================== SET-UP I/O ======================================================//
void setup ()
{
Serial.begin(9600); //Serial Communication
//----==== Welcome Tone
noTone(A0);
tone(A0, NE5, 600);
delay(275);
noTone(A0);
delay(50);
noTone(A0);
tone(A0, NE6, 600);
delay(200);
noTone(A0);
//----==== Set-Up LCD
//=======================FIAT SPLASH SCREEN
display.begin();
display.setContrast(60);
display.clearDisplay();
display.setTextSize(2);
display.setTextColor(BLACK);
display.setCursor(16,0);
display.println("FIAT");
display.setCursor(20,16);
display.setTextSize(2);
display.println("Uno Mille");
display.display();
delay (1750);
//======================PROTOTYPE VER DISPLAY
display.clearDisplay();
display.setTextSize(1);
display.setCursor(20,8);
display.println("Welcome");
display.setCursor(10,24);
display.println("Ubermacht");
display.setCursor(4,32);
display.println("Auto-Kontrol");
display.setCursor(0,40);
display.println("Prototype V4.3a");
display.display();
delay (1000);
//----==== Outputs and Inputs Set-Up
pinMode(StatusLED, OUTPUT); //Status LED
pinMode(StartBTN, INPUT); //Start Button
pinMode(IgnitionRLY, OUTPUT); //Ignition Relay/Control
pinMode(StarterRLY, OUTPUT); //Starter Relay/Control
//----==== Tachometer reading set-up
attachInterrupt(0, rpm_fun, CHANGE);
rpmcount = 0;
rpm = 0;
timeold = 0;
}
//=====================================--- LOOP ---==============================================//
void loop ()
{
//========== Engine RPM Reader
detachInterrupt(0);
rpm = 30*1000/(millis() - timeold)*rpmcount;
timeold = millis();
rpmcount = 0;
attachInterrupt(0, rpm_fun, CHANGE);
Serial.print(rpm);
//========= Button Read;
StartValue = digitalRead (StartBTN);
//----------------============ Button Press Verification
if (StartValue != StartValue2)
{
if (StartValue == HIGH)
{
StartStatus ++;
Serial.println(StartStatus);
noTone(A0);
tone(A0, NF5, 600);
delay(100);
noTone(A0);
delay(80);
tone(A0, NF5, 600);
delay(100);
noTone(A0);
}
}
StartValue2 = StartValue;
//----------------============
//------------------------------ Stage 0 - Idle - DISABLED IN THIS VERSION
if (StartStatus == 0)
{
/*
Serial.println("Stand-by Mode - Waiting for Start - E0S1");
// Display Message on LCD
lcd.clear();
lcd.print(" SYSTEM OFF ");
lcd.setCursor (0,2);
lcd.print(">>>Press Starter");
*/
//Check if everything is off;
digitalWrite (StarterRLY, LOW);
digitalWrite (IgnitionRLY,LOW);
digitalWrite (StatusLED, LOW);
StartRetry = 0;
Timeout = 0;
Flag = 0;
if (rpm > 0) //If ON goes to Stage 5 - Running
{StartStatus = 5;}
else
{StartStatus = 1;}
delay (10);
}
//------------------------------ Stage 1 - Ignition
if (StartStatus == 1)
{
Serial.println("Start Mode - Waiting for Confirm - E0S2");
//-------- Display Timeout Message
display.setTextColor(WHITE, BLACK);
display.clearDisplay();
display.setTextSize(1);
display.setCursor(0,0);
display.println(" ENGINE OFF ");
//display.setTextColor(BLACK,WHITE);
display.setTextSize(1);
display.setCursor(0,8);
display.println(" Hold Start ");
display.display();
StartRetry = 0;
Timeout = 0;
//~~~~~~~~~~~~ Create LED Hold effect
digitalWrite (IgnitionRLY, HIGH);
for(int fadeValue = 0; fadeValue <= 255; fadeValue +=5)
{
analogWrite(StatusLED, fadeValue);
delay(3);
}
for(int fadeValue = 255 ; fadeValue >= 0; fadeValue -=5)
{
analogWrite(StatusLED, fadeValue);
delay(3);
}
delay(100);
//~~~~~~~~~~~~ TIME OUT SYSTEM (IN CASE OF STAGE ZERO ACTIVE)
/* Timeout ++;
if (Timeout > 8)
{
StartStatus = 0;
Timeout = 0;
}*/
if (rpm > 200) //If ON goes to Stage 5 - Running
{StartStatus = 5;}
else
{StartStatus = 1;}
}
//------------------------------ Stage 2 - Starting up
if (StartStatus == 2)
{
Serial.println("Start up Procedure - Start on Course - E1S3");
display.setTextColor(WHITE, BLACK);
display.clearDisplay();
display.setTextSize(1);
display.setCursor(0,0);
display.println(" ENGINE START ");;
display.setTextColor(BLACK,WHITE);
display.setTextSize(1);
display.setCursor(0,8);
display.println(" Starting Up ");
display.display();
//-------------========= LED Effect before start;
for(int fadeValue = 255 ; fadeValue >= 0; fadeValue -=5)
{
analogWrite(StatusLED, fadeValue);
delay(10);
}
digitalWrite(StatusLED, LOW);
delay (500);
for(int fadeValue = 0; fadeValue <= 255; fadeValue +=5)
{
analogWrite(StatusLED, fadeValue);
delay(10);
}
//-------------=========
//--- Ensure Ignition relay is ON
digitalWrite (StarterRLY, HIGH);
//--- Ignition for 0.5 sec
digitalWrite (StatusLED, HIGH);
delay (500);
digitalWrite (StarterRLY, LOW);
//--- Follow next stage - Start-up verification
Serial.println("Start up Procedure - Test of engine start up - E2S1");
StartStatus = 3;
delay (500);
}
//------------------------- Ignition verification
if (StartStatus == 3)
{
Timeout ++; //Timeout happens to let engine stabilize revs or ensure unsucessfull start
delay(50);
/* ************* LCD DISABLED *************
Serial.println ("Testing Ignition - E2S2");
Serial.println ("RPM is: ");
Serial.print (rpm);
*/
//------====== On verification if engine ON or OFF
if (Timeout > 10) //While timeout is not complete test doesnt happen
{
if (rpm > 0) //If ON goes to Stage 5 - Running
{
StartStatus = 5;
}
else // If OFF goes to Stage 4 - Retry
{
delay (250);
StartStatus = 4;
Timeout = 0;
}
}
else // If timeout not reached, tests again and ++ on Timeout variable
{
StartStatus = 3;
}
}
//==============================Retry System
if (StartStatus == 4)
{
Serial.println ("Ignition Retry - Could not start, will retry...");
display.setTextColor(WHITE, BLACK);
display.clearDisplay();
display.setTextSize(1);
display.setCursor(0,0);
display.println(" ENGINE START ");
display.setTextColor(BLACK,WHITE);
display.setTextSize(1);
display.setCursor(0,8);
display.println(" Start Failed ");
display.display();
delay (500);
//------====== On verification if started
if (StartRetry < 2 && rpm > 0)
{
StartRetry =0 ;
StartStatus = 5;
delay (300);
}
//------====== On verification if unsucessful
if (StartRetry < 2 && rpm < 30)
{
//Retry Tone
noTone(A0);
tone(A0, NG4, 600);
delay(650);
noTone(A0);
display.setTextColor(WHITE, BLACK);
display.clearDisplay();
display.setTextSize(1);
display.setCursor(0,0);
display.println(" ENGINE START ");
display.setTextColor(BLACK,WHITE);
display.setTextSize(1);
display.setCursor(12,8);
display.print("Retrying");
display.display();
delay (500);
StartRetry ++;
StartStatus = 2;
delay (300);
}
else //------====== On verification is unsucessfull more than three then, give up
{
//End-of-Tries Tone
noTone(A0);
tone(A0, NG4, 600);
delay(110);
noTone(A0);
delay(80);
tone(A0, NG4, 600);
delay(110);
noTone(A0);
delay(80);
tone(A0, NG4, 600);
delay(110);
noTone(A0);
StartStatus = 0;
StartRetry = 0;
delay (300);
}
}
if (StartStatus == 5)
{
for(int fadeValue = 255 ; fadeValue >= 15; fadeValue -=5)
{
analogWrite(StatusLED, fadeValue);
delay(10);
}
noTone(A0);
tone(A0, NG3, 600);
delay(110);
noTone(A0);
delay(80);
tone(A0, NG4, 600);
delay(110);
noTone(A0);
delay(80);
tone(A0, NG5, 600);
delay(110);
noTone(A0);
digitalWrite (IgnitionRLY, HIGH);
StartStatus ++;
}
//------------------------------ Stage 3 - Running
if (StartStatus == 6)
{
Serial.println("Running Mode - Engine Running - E2S4");
display.clearDisplay();
display.setTextSize(2);
display.setTextColor(BLACK,WHITE);
display.setCursor(0,0);
display.println(rpm);
display.display();
digitalWrite (IgnitionRLY, HIGH);
analogWrite (StatusLED, 15);
delay(10);
if (rpm < 100)
{StartStatus = 1;}
else
{StartStatus = 6;}
}
//------------------------------ Stage 4 - Shut-down
if (StartStatus == 7)
{
Serial.println("Shut-down Mode - Cutting off Engine - E3S5");
/*
lcd.clear();
lcd.print(" SHUTTING DOWN ");
lcd.setCursor (0,2);
lcd.print("Please Wait...");
*/
noTone(A0);
tone(A0, NG5, 600);
delay(110);
noTone(A0);
delay(80);
tone(A0, NG4, 600);
delay(110);
noTone(A0);
delay(80);
tone(A0, NG3, 600);
delay(110);
noTone(A0);
digitalWrite (IgnitionRLY, LOW);
digitalWrite (StarterRLY, LOW);
digitalWrite (StatusLED, LOW);
delay (1000);
}
if (StartStatus == 7)
{ StartStatus = 0;}
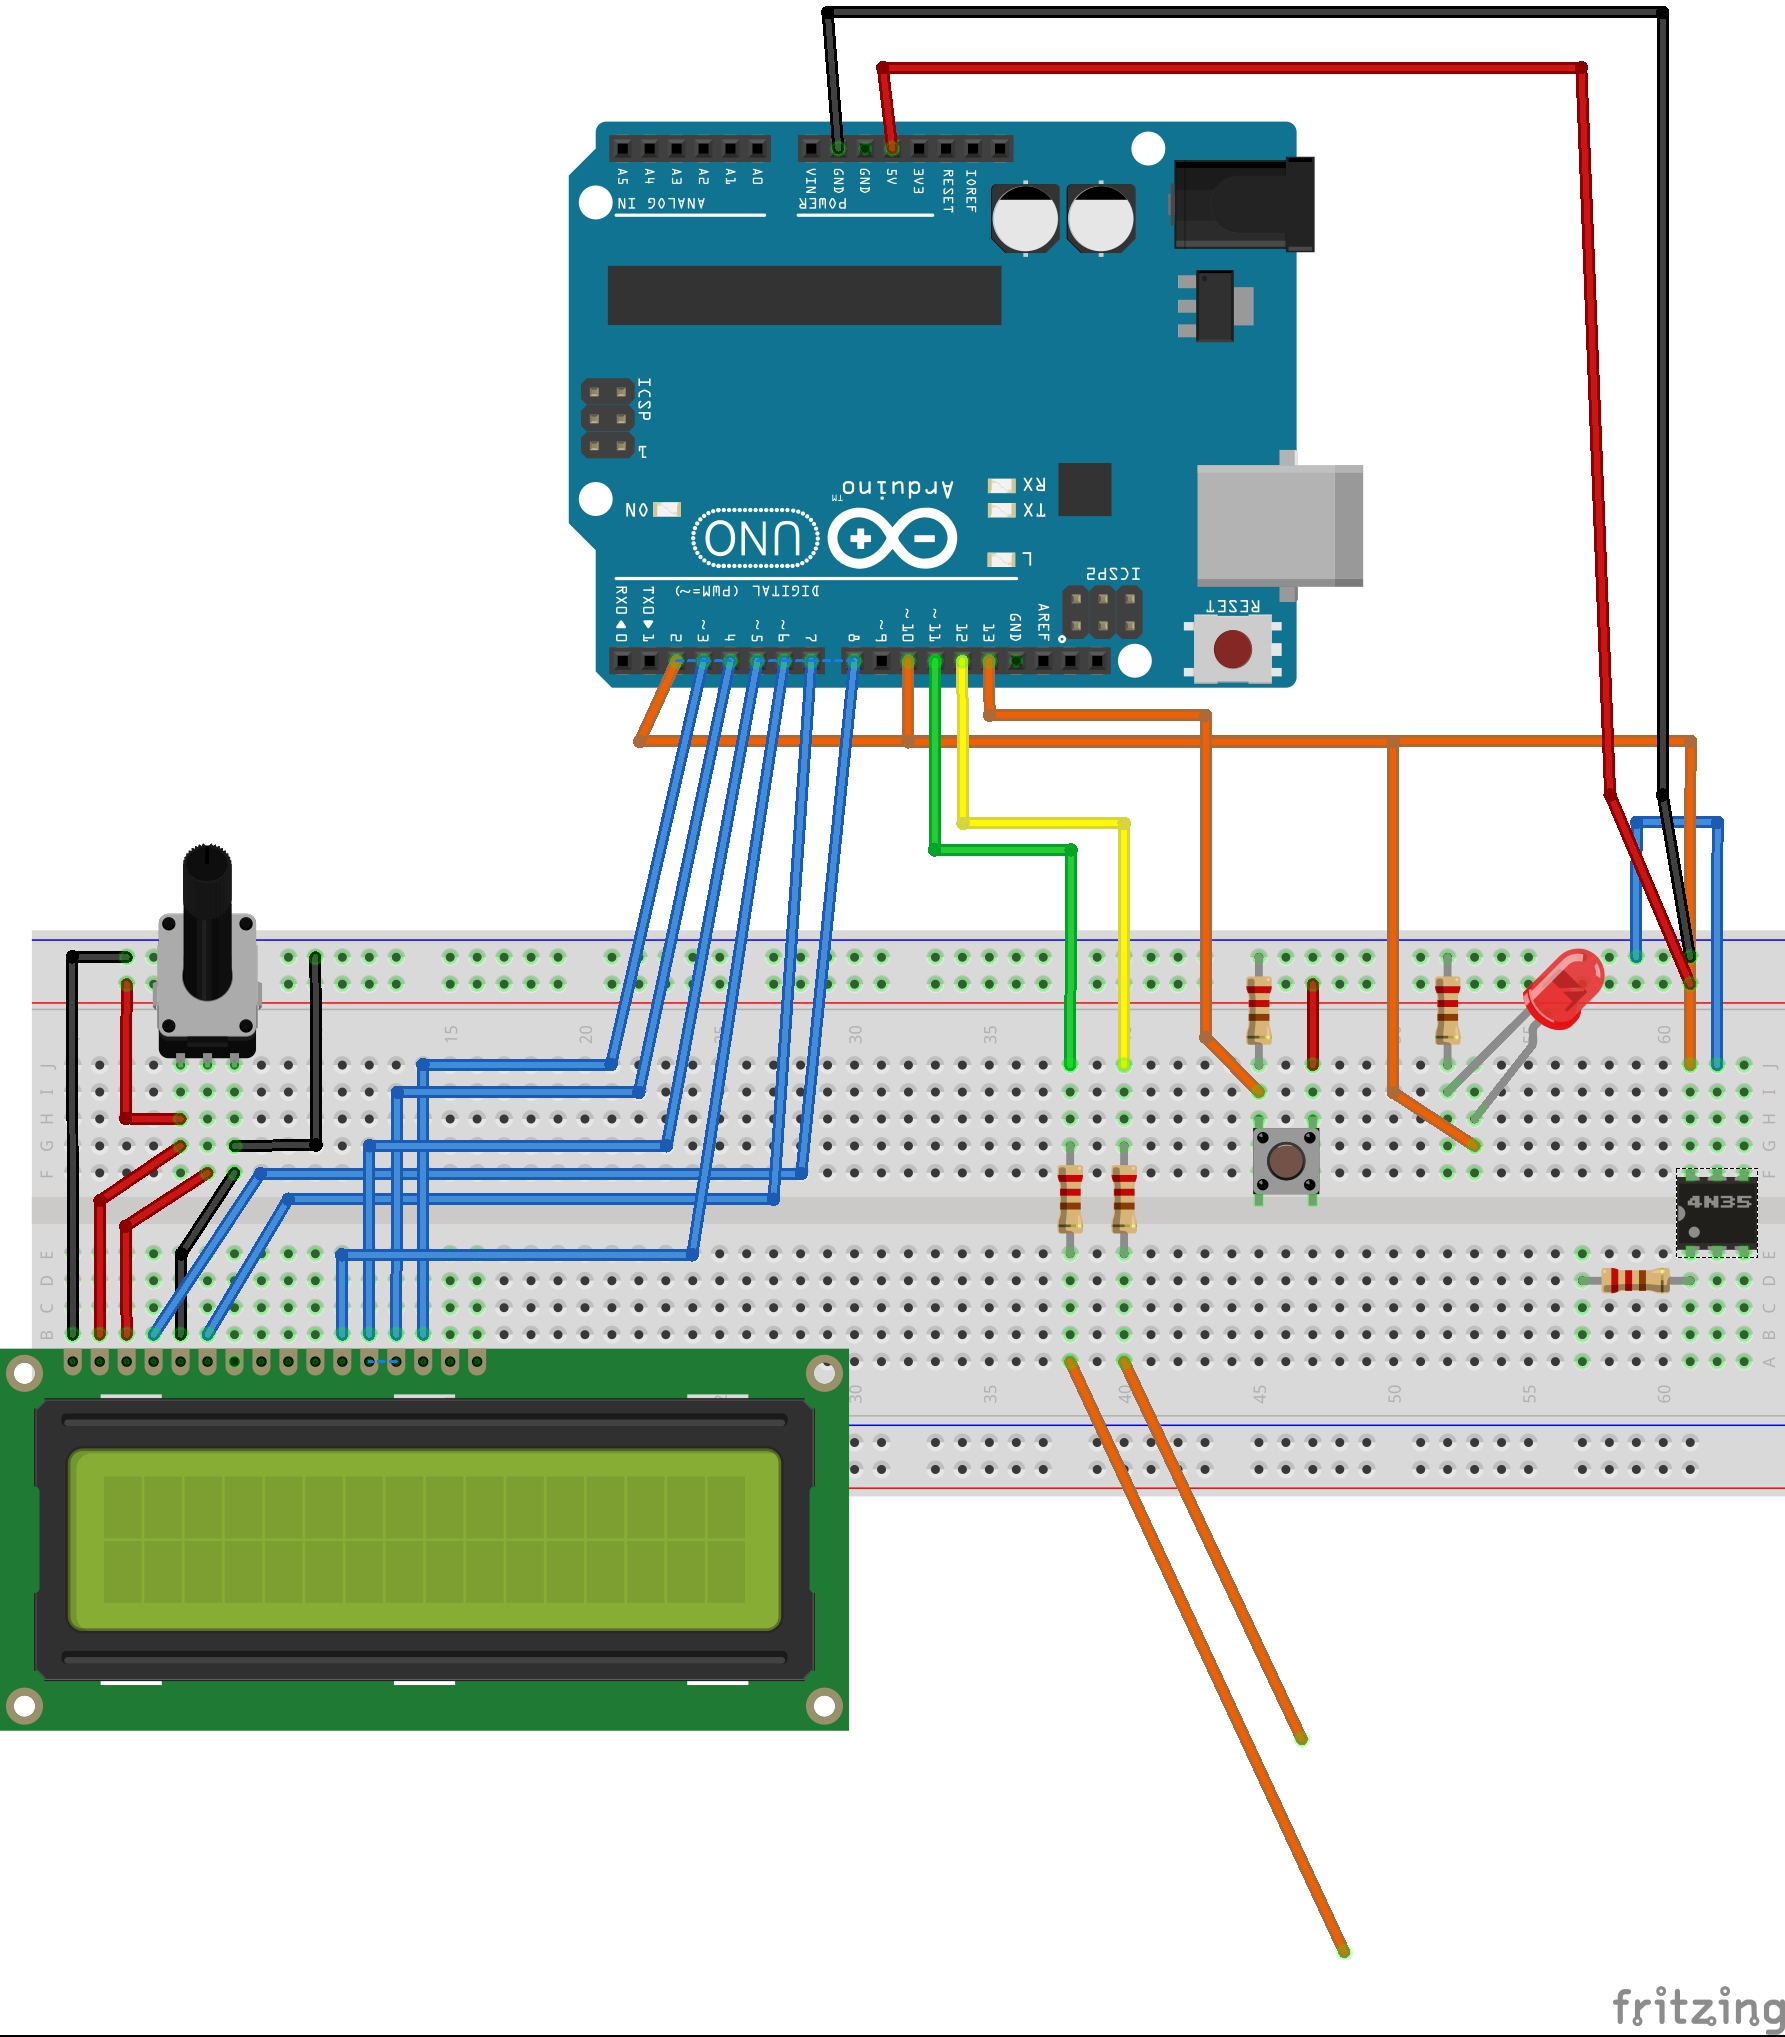
}Devre Şeması


Devrenin çalışma mantığı nedir…
Sorunuzu daha detaylandirirsaniz,.yardımcı olmaya çalışacağız. Merak ettiğiniz ya da anlamadiginiz kısımları lütfen detaylı olarak belirtin.
Devrede 4n35 yazan parça nedir UNO da 11 ve 12. Uçlar nereye gidiyor buton nasıl çalışıyor zamanlı mı tek tek basmak mı gerekiyor…
Kodun gerçek sahibi sizmisiniz
Cevap verecekmisiniz
Tekrar merhaba, gayet net olarak yazmışım fakat gözünüzden kaçmış sanırım. Sorunuzu ve öğrenmek istediklerinizi detaylı olarak açıklarsanız elimizden geldiğince destek olmaya çalışabiliriz.